Your Cart is Empty
Different decoration methods and how to choose them. There are many different methods available for decorating your garments with your design. Some methods work only on certain garments or different abilities to resolve detail. They all have different price points. This guide gives you all the information you need to make the best choice for your situation.
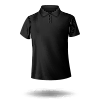
The different choices. We currently offer these decoration choices: Screen Printing, Digital Printing, Direct Embroidery, Wick Printing, and Heat Printing. This chart gives a brief summary of the different processes.
| Decoration Type | Description | Main Use | Pros/Best For | Cons/Bad For |
|---|---|---|---|---|
Screen Printing |
Liquid ink is pushed through a stencil then cured in an oven. Each color is printed separately with it’s own stencil. | Medium to long run printing of garments. |
|
|
Digital Printing / Direct to Garment (DTG) |
Liquid ink is sprayed by a computer controlled print head. Reproduces full range of colors in one step. | Single piece and short run printing on garments or for full color printing. |
|
|
Direct Embroidery |
Different color threads are sewn into the garment by a computer controlled machine to create the desired image. | Ball caps, polo shirts or jackets with left or right chest designs. |
|
|

Screen prints are opaque, durable, and economical.
Screen printing is a decoration process that uses a fine mesh with a hard emulsion blocking some of the mesh. Your design makes up the parts of the mesh that are not blocked by the hard emulsion. Ink is pressed through the mesh onto the t-shirt. The inked t-shirt is then heated in a conveyor dryer to over 330 degrees to cure the ink. The ink used in screen printing is called plastisol. Plastisol is a rubbery plastic based ink that is very durable and will last as long as the shirt. Plastisol ink washes well and is perfect for any shirt that will see repeated use.
Screen printing as a decoration process dates back to ancient China where it was developed as an alternative to applique embellishment. The screen printing process is much more complex today. The main components of the screen printing process are the artwork, screen frame and mesh, ink, and printing equipment. The best way to tell the story is to follow an order through the screen printing cycle.
Artwork used in screen printing garments is much different than artwork used in other printing processes. Compared to metal or paper, garments come in many different colors, have a rough surface, and are soft and pliable. Our artists take into account all these factors when they prepare your artwork for screen printing. We remove fine details that are too small to print, calculate how to reproduce tones properly on the color of shirts ordered, and separate multicolor designs into a series of layers (one for each ink color). Tints of a color must be created that work well with the variety of garment textures and ink viscosity. Once the artwork is complete, it is ready to image on to the screen frame.

Emulsion applied to a screen |

Screen with emulsion |

Image printing on screen |

Screen with image |

Screen printing squeegees |
The screen frame is a rectangular wood or metal frame that has a mesh stretched and secured to it. We use tubular metal frames that are tightened after each use. We use different types of mesh with holes that range larger than a window screen to so small you can’t see the holes. The mesh is stretched as tight as a drum with a pneumatic machine. The tighter the mesh, the better the final image. After stretching, emulsion is put in the screen. Emulsion is a photosensitive (light-activated) chemical suspended in a base similar to white glue. A machine moves a tray filled with emulsion evenly across the surface of the mesh, coating the screen surface. The more consistent the layer of emulsion, the more consistent the quality of the imprint. Humidity-controlled dark rooms are used to dry the screen.
Since emulsion is activated by light, the image must be transferred to the frame so that light can reach some parts of the emulsion and not others. In the early 1980’s, this was done by taping a clear carrier sheet on which the design was printed in opaque ink. Modern technology applies the design directly to the emulsion by a special ink-jet printer that uses an opaque wax. Next the screen is placed in a machine that has a high power light bulb. This causes the parts of the emulsion that are exposed to the light to harden. The parts of the design under the wax image remain soft and will dissolve with water. We place the exposed screen in a backlit washing cabinet and use water to remove the unhardened emulsion. This leaves the image areas open and the non image areas blocked.
Most our our ink colors are mixed in-house from bases that are free of lead and phthalates. Different inks have different opacity and require different mesh sizes to flow freely onto the garment.

This is where everything comes together! Screens, ink, and shirts are moved to one of our state-of-the-art automatic presses. An experienced press operator sets up the press for each run by placing each screen in the press one at a time and loading ink into each screen. Alignment is verified with a series of test prints to ensure that the image will be correctly positioned on the garment and relative to other colors.Screen printing multicolor designs is like putting together a coloring book page where each color is a separate piece of paper. You have to get all the colors in the right place, without gaps or overlaps. This process is known as registration and, depending on complexity, can take a few minutes or a few hours.
Once all the shirt sizes and colors are verified, the press operator begins placing shirts onto the press. Each shirt rotates under each screen which is then lowered to meet the garment. A hard rubber blade draws across the screen forcing ink through the open areas of the emulsion and onto the shirt below. The screen rises and the next shirt rotates under the screen. Each ink color is printed individually one shirt at a time and takes about 5 seconds.Finally, each shirt is placed in a long conveyor-belt dryer that looks a lot like a pizza oven. The shirt must reach 330 degrees to cure the ink. Temperature sensors ensure a proper cure every time. Each shirt is individually removed at the end of the conveyor, inspected, folded, counted and shipped.

Color 1: Red |

Red Ink Applied |

Color 2: Blue |

Blue Ink Applied |

Color 3: Green |

Green Ink Applied |
Once the garments are printed, all the remaining ink is removed from the screen using an automated machine. The organic, water based solvent is recycled and all ink particles are trapped for proper disposal. The emulsion is removed from the mesh and the screen is re-tensioned so we can begin the process again. Frames are typically reused the following day. All waste is monitored and neutralized before disposal.
We use modern, environmentally responsible screen printing methods. There are many methods in use in the marketplace and you should be informed of the affect those can have on quality, cost, and the environment. We’ve been printing since 1982 and have seen and tried many advancements in our industry. Some were revolutionary and others were headaches. Here are some other methods you should be aware of.
In the beginning of apparel screen printing, artwork was cut in a red film material called rubylith with fine lines inked with opaque black ink. This was done with a very sharp knife, a variety of ink pens with different width tips, and a set of drafting tools. Details were only as good as the steady hand and gifted eye of the artist. When you see some reproductions of 1960 designs, you will often see an attempt to recreate this hand cut and hand drawn method. When computers became readily available, the industry switched over to laser printers printing to a semi-opaque vellum paper. This provided a huge advantage to hand cutting but image sharpness was lost due to the paper not being clear. The industry then moved to large format inkjet printers using a clear polyester film. Images were sharper but generated a large waste stream of spent film, ink cartridges, and chemicals. Modern technology (described above) uses no film, no paper, no cartridges and no chemicals; only a water-soluble wax.
Historically, permanent screens are made from 2″ x 2″ metal or wood. With permanent frames, it is difficult to stretch the mesh and time consuming to remove the old image, so it’s cost-effective at first to just store and reuse screens over and over. After each use, the mesh gets looser and looser and the image quality suffers. Even the smallest shops will have hundreds of these fixed frames in racks. By 1992, we had already accumulated over 800 wood frames. If we had continued with this model, we would have over 10,000 frames. Modern retensionable metal frames (described above) save space, improve print quality, and save trees.
There are many different kinds ink available in the market place. Some inks used on textiles contain bleach, phosphates, or other hazardous chemicals. Often ink is selected purely for low cost with little regard for safety or the environment. Have you ever seen a young child with part of their t-shirt in their mouth? It’s worth asking what kind of ink is being used.
Preparing a stretched frame without technology is an arcane task. Emulsion must hand coated on to the mesh. This can result in ripples or uneven emulsion and is entirely dependent on the operator. The operator must maintain the applicator scoop at a uniform angle and move it a a uniform speed to get a uniform layer of emulsion on the mesh. If you have an old t-shirt that has a band where the ink washed off quicker than other parts, this is usually due to a poor quality hand scoop of the emulsion. Briefly, the industry used emulsion that was applied like a sticker. It worked well, but was expensive and had a large waste stream of leftover film.
Printing presses can be classified into manual or automatic presses. In a manual press, the ink is forced through the stencil my hand with a rubber blade. Each ink color in the design is printed in sequence with one or more applications of the ink. Manual presses are typically built to accommodate from 1 to 6 different screens and from 1 to 6 shirts loaded at one time. A manual press is a light weight machine and is run completely by hand. Difficulties with manual printing are errors in multicolor registration, inconsistent ink layers from variations in squeegee angle and speed, and high levels of operator fatigue. Long time manual press operators are likely to develop Carpal Tunnel Syndrome. Sadly, many small shops still use manual presses for the majority of their printing, risking their operators long term health.
The largest area of environmental concerns in screen printing occurs after the t-shirts have been printed. There are toxic chemicals used in ink and emulsion removal and the risk of a solid waste stream tainted with uncured ink and solvents. The solvents used to remove ink ranges from organic solvents based on orange peels or soy beans to mineral spirits and acetone. The U.S. Environmental Protection Agency has done case studies into these issues. Post-processing of screens is a complicated and intense process.

Digital prints are great for colorful designs with smooth gradients.
Digital Printing is a decoration process applies a design directly from a computer file to the garment, using water based inks. The process can be used for any color garment, provided the garments are of a particular fabric type. For any garment color other than white, a base white layer and a pre-treatment is applied to make the design visible.
The artwork for digital printing is unique compared to all our other decoration methods. We use a filter of sorts to convert colors to closely match our screen printing inks. This color palette is specific to digital printing to get the best results out of the printer and is unique to our particular printer. To properly reproduce particular colors, we have modified the standard computer definition so the results on the shirt will match the color desired. Hundreds of tests and hours were spent to get the best possible match. Some colors cannot be reproduced as they contain fluorescent pigments not available in the inks used in a digital printer. In screen printing, tints and shades are made up of small dots with the shirt color showing between the dots. The size of each dot determines how much of a tint of the solid color is showing. Digital printing, by default, starts with a solid layer of white ink with then the dots of color applied to it. To show accurate results when compared to screen printing, this solid layer of white ink has to be removed for tints reproduce as dots of color with shirt color between. As this function was not available commercially, we had to write a special program that processes the artwork so tints and shading reproduces properly. The artwork is then processed through a different computer to convert the file to be readable by the digital printing machine.
The shirt must be prepared for digital printing as well. It’s first coated with a special pre- treatment solution that keeps the ink from being pulled into the shirt material. This solution is applied in a machine designed to put down a consistent layer on the area to be printed. The shirt is then pressed to flatten the fibers and remove the water from the solution. The shirt is then ready to the put in the digital printer.
The ink used in the digital printing process is a water based pigment style ink that is inserted into the machine by way of a cartridge. The ink is specially formulated for garments and requires careful application and processing for best results.

The shirt is placed in the printer and positioned so the image will be in the proper location on the shirt. The white ink is then printed in 1 or 2 passes, depending on the garment color, followed by the 4 different color inks. The color inks are the standard cyan, magenta, yellow and black or CMYK colors. The resolution of the printer is 600dpi x 600 dpi where standard resolution in screen printing is about 72 dpi. After the printing process is complete, the shirt is then taken off the press and placed in a different hot press to cure the ink. The ink must get up to around 300 degrees. It’s at this point the pretreatment may sometimes appear discolored. This discoloring will wash away in the first wash. The shirts are cooled for several minutes and stacked. The order is then packed and sent on it’s way to you.
Digital Printing is a relatively new technology for garment decoration. In our investigation we found a variety of machine/ink/chemical combinations. While the results vary and the chemistry is different. The basic process for digital printing is the same.

This shows the image before and after being digitized for embroidery.
The embroidery process is one of the oldest fabric decoration methods. It consists of strands of thread, in various colors, sewn into the garment to create an image, text, or design. The threads can applied in various patterns, lengths, and thicknesses to produce an array of different visual effects.
Oasis Promos uses a two step artwork technique to produce custom embroidery designs. The first step is the preparation of a “flat” proof that contains the basic details and colors to be embroidered. We work with the customer to capture the essence of the image to achieve the goal. Embroidery has a very low resolution and many fonts, images, and ideas must be simplified by the artist to ensure that the design will look good when sewn. For example, fades, tints, and blends that are easy to do with ink are very difficult to do with individual segments of thread.
Once the customer approves the proof, our digitizing artist converts the image to a series of computer instructions for the machines to sew. This is done using both computer software and experience to gauge the direction of the stitches, the size of the stitches, how the colors get sewn, and a myriad of other subtle choices that yield an embroidered design. We use our own digitizer as each machine has slightly different results. After digitizing, we will sew out the design on a piece of scrap fabric for proofing purposes.
We use polyester thread for fade resistance, color consistency, and range of colors.